Creating a Character
There are three ways to get a playable character into your world: the guided character creator, building one by hand from the compendiums, or importing an existing character. Most players should start with the creator. It walks you through every decision in order and wires everything up for you.
To begin, create a new Actor from the sidebar and pick Character from the type list. This opens the Character Creation Helper.
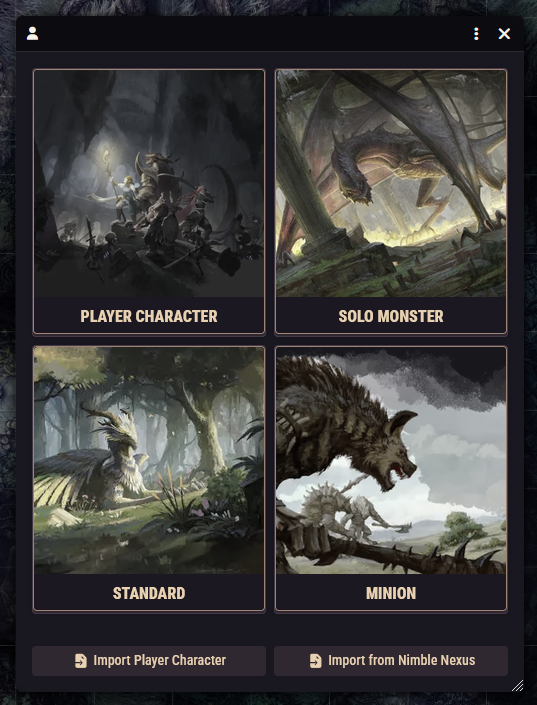
The guided character creator
The creator is a single scrolling window with a progress bar. Each choice you make reveals the next step and scrolls you to it. Give your character a name at the top, then work through the steps below. Some steps only appear when your earlier choices call for them.
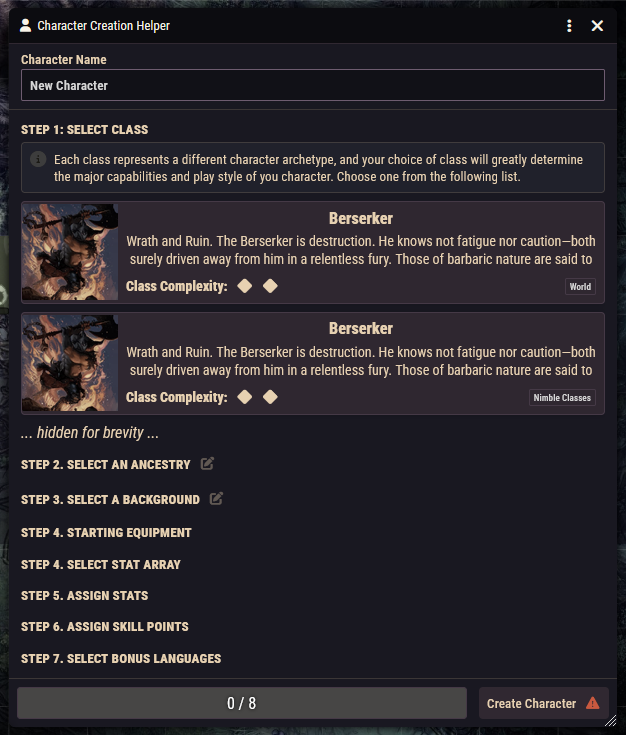
- Class. Pick your class. This determines your hit die, saving throw tendencies, and everything that arrives on later steps.
- Class features (only if your class grants features at level 1). Features your class always grants are listed automatically; if your class offers a choice (pick one of several options), you make that pick here.
- Spells (only for spellcasting classes). Depending on the class, you may pick one or more spell schools, pick individual spells, or simply see the spells you're granted automatically.
- Ancestry. Choose from the core and exotic ancestry lists. Ancestry bonuses to stats and skills are applied for you and shown later during stat assignment.
- Ancestry options (only for some ancestries). If your ancestry comes in more than one size, pick one. A few ancestries also let you choose a saving throw to be good at.
- Background. Pick a background. Like ancestry, any bonuses it grants are handled automatically.
- Background options (only for some backgrounds). The "Raised by Goblins" style background asks which ancestry raised you. This renames the background and grants that ancestry's language. A few backgrounds also grant spell picks, which appear here.
- Starting equipment. Choose your class's starting equipment or 50 gold instead. If you take the equipment, it lands in your inventory already equipped; if you take the gold, it lands in your coin purse.
- Stat array. Pick one of the standard arrays (see the Nimble rulebook for what each array offers).
- Stat assignment. Assign the array's values to your abilities. Bonuses from your ancestry, background, and class are shown alongside so you can see the final numbers.
- Skill points. Assign 4 skill points across your skills.
- Bonus languages (only if your Intelligence modifier is positive). Choose one bonus language per point of Intelligence modifier. Languages granted by your ancestry or background are already accounted for.
- Create. The final button creates the character and opens its sheet.
You can bail out early
You can press the create button before finishing every step. The creator will warn you that the character is incomplete and let you proceed anyway, which is handy if you want to fill in the rest by hand. If you skipped the starting equipment choice, no equipment is granted.
Building manually
If you would rather assemble a character piece by piece, create the character through the creator (finishing early is fine), then drag items onto the sheet from the compendiums:
- Drag a class, ancestry, and background onto the sheet. Each brings its rules with it: proficiencies, stat bonuses, and granted equipment apply automatically.
- Drag features, spells, and equipment from their compendiums onto the matching tabs.
- Set your ability scores, skill points, and languages from the Core tab with the sheet's editing toggle enabled.
This path gives you full control, but nothing checks your work. The creator exists precisely so you don't have to remember every step.
Importing
The actor creation window also offers two import options: importing a character from a JSON file (for example, one exported from another world) and, for GMs, importing from Nimble Nexus. See Importing & Exporting for both.
What to check after creation
Open the new sheet and give it a quick once-over:
- Hit Points: your maximum HP comes from your class. Make sure the HP bar looks right.
- Hit dice: you should have one hit die of your class's size at level 1.
- Mana: if you play a spellcasting class, the mana bar appears in the sheet header. No mana bar means the sheet doesn't think you're a caster.
- Known spells: check the Spells tab against what you picked in the creator.
- Equipment: if you chose starting equipment, it should already be equipped on the Inventory tab; if you chose gold, you should have 50 gp.